Specify Alternate Upload Speed in BitComet in Windows 7
It is always recommended that every user who uses torrent application to download stuff from the Internet should also keep on seeding downloaded files in order to maintain appropriate upload and download ratio which many times is quite helpful in keeping the accounts active and alive on many sites. BitComet although keeps on uploading the files even when the download is not active or completed still the application provides a feature using which users can specify the alternate upload speed limit in case the downloading is not in process. This feature helps the users to limit the bandwidth of Internet for the uploading of the files so that the accounts can gain decent credits from the sites. As a BitComet user in Windows 7 if you want to specify the alternate uploading speed you are required to follow the steps given below:
-
Logon to Windows 7 computer on which BitComet application is installed.
-
Double-click on the icon of the application to initiate it and get its interface.
-
Once opened click on Tools menu and from the available list click on Options.
-
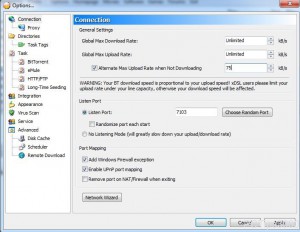
On the opened box make sure that you are on Connection option from the left pane and from the right pane under General Settings section check Alternate Max Upload Rate When Not Downloading checkbox.
-
On the enabled box opposite to the checkbox specify the maximum upload limit.
-
Click on Ok button to complete the process and close the wizard.
