How to Rename Local Built-in Administrator Account through Group Policy in Windows 7?
When Windows 7 is installed an administrator account is automatically created and by default it is disabled. This is due to security reasons so that no one can misuse the unrestricted privileges of the account. In many production environments however to make the network even securer administrators rename the default name which is Administrator of built-in administrator account. The reason behind this is just to double up the security and making it harder for a hacker to guess the username and the password. If administrator account is not renamed hackers only have to guess the password as they already know that default account name is always Administrator. As an administrator you can rename the built-in Administrator account by going to Computer Management> Local Users and Groups> Users. This method will rename the default Administrator account on a single computer. However in domain environments group policies are used for these tasks which work in more efficient manner. Therefore if you want to rename Administrator account through group policy you need to follow the steps given below:
- Logon to the computer with administrator account.
- Click on Start button.
- At bottom of start menu in search box type gpedit.msc command and press enter key.
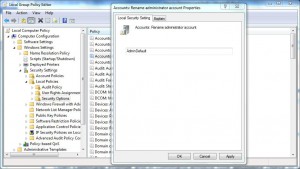
- On Local Group Policy Editor snap-in under Computer Configuration expand Windows Settings and then expand Security Settings.
- Expand Local Policies and click on Security Options.
- From the right pane double click on Accounts: Rename administrator and on the opened box type a new name for the administrator account.
- Once done click on Ok button and close Local Group Policy Editor snap-in.
- Open Command Prompt and in command window type gpupdate /force to update here computer policy with latest configuration.
- Close Command Prompt.
