Manage Operating System Timeout Duration in Windows 7
Microsoft Windows 7 is not very old in the market and users still feel comfortable while using Windows XP. Considering this many users install multiple operating systems on the computers so that they can use Windows XP for their normal work and can experience the new features offered by the latest operating system that is Windows 7. It is recommended that while going for multiple operating systems on a single machine users must install the older version of operating system first and then they should install the recent version so that both of them can work smoothly. When multiple operating systems are installed on a computer Windows offers a timeout duration which provides a default time of 30 seconds to the users before which they need to select the operating system they want to use on the computer. If the users run out of time the default operating system selected by the computer automatically boots. Administrators can increase or decrease this timeout duration by following the steps given below:
-
Make sure that you are logon to Windows 7 computer with administrator account.
-
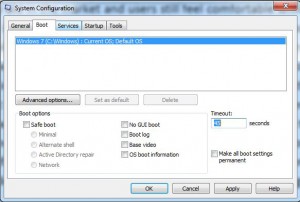
Click on Start button and at the bottom of the menu in search box type MSCONFIG and press enter key.
-
On the opened box go to Boot tab and adjust the desired time out in Timeoutfield.
-
Once done click on Ok button to save the changes.
-
Restart your computer to check the effect of the modifications you have made.
