Prevent Windows 7 from Entering Sleep Mode
When Windows 7 operating system is installed on a computer all the default settings are automatically applied on it. Along with other default settings one main setting is also applied which allows computers to enter into sleep mode if no user activity is detected by the Windows 7. This configuration is mostly useful for laptop PCs as it is expected that most users of laptop PCs are not directly connected to the part outlets most of the times. This configuration allows laptop PCs to save energy hence extending the duration of batteries. However in desktop PCs this configuration is not required and therefore users may want to disable this in order to eliminate the requirement of providing passwords every time the computers wake up from sleep mode. As a Windows 7 user if you want to prevent computers from entering into sleep mode you are required to follow the steps given as below:
-
Logon to Windows 7 computer.
-
Click on Start button and from the menu click on Control Panel.
-
On the opened window click on Hardware and Sound category link.
-
On the appeared window click on Power Options.
-
On Select a power plan page click on Change plan settings under the category of radio button representing the selected power plan.
-
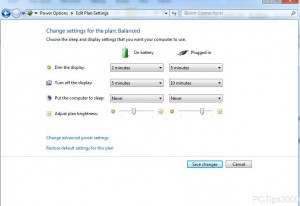
On the next page from the drop-down list in front of Put the computer on sleep section choose Never.
-
Finally click on Save changes button to save the changes and allow them to take effect.
