Specify Maximum Upload Limit in BitComet in Windows 7
In any torrent application Internet bandwidth plays an important role as far as downloading is concerned. When users start the downloading process using any torrent application the entire Internet bandwidth is consumed by the application which many times do not allow users to surf through the Internet smoothly. Therefore users can limit the downloading speed using the interface of the application. Many users however still do not know that uploading speed of the Internet using any torrent application also plays equally important role in the performance of Internet connection and therefore many times users may also want to manually specify the maximum upload limit for the entire application. As a Windows 7 user if you want to limit the maximum upload speed in BitComet application you are required to follow the steps given below:
-
Logon to Windows 7 computer on which BitComet torrent application is installed.
-
Double-click on the icon of BitComet to start the application and view its interface.
-
From the menu bar click on Tools and from the available menu click on Options.
-
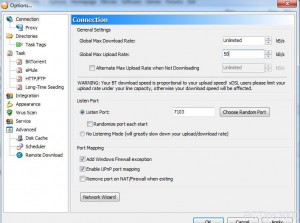
From the left pane make sure that Connection option is selected and from the right pane specify the maximum upload limit in the available box in front of Global Max Upload Rate under Global Settingssection.
-
Once done click on Ok button to save the changes.
