Virus-Scan Downloaded BitComet Files in Windows 7
BitComet is quite versatile application which provides users several features so that they can make downloading process secure and easier at the same time. The application is quite sophisticated which also allows users to specify the path of any locally installed antivirus applications so that any downloaded information can be scanned for viruses after the process is complete. This configuration however only works when any anti-virus application is installed on the computer and if it is so users can make their computers highly secured even though the port number used by torrent application is open. It is recommended that the anti-virus application which is mapped to the torrent application must be up to date with all the definitions. As a BitComet user in Windows 7 if you want to specify the path of anti-virus application so that all the downloaded files can be scanned you are required to follow the steps given below:
-
Logon to Windows 7 computer on which BitComet and any strong anti-virus application is installed.
-
Open the interface of BitComet by double-clicking on its icon on the desktop.
-
Click on Tools menu from the menu bar and from the appeared list click on Options option.
-
From the left pane click on Virus Scan option to select it.
-
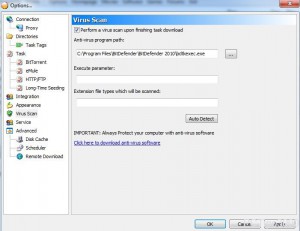
From the right pane check the checkbox saying Perform a virus scan upon finishing task download.
-
Click on ‘…’ button under Anti-virus program pathand browse for and locate the executable file for the installed anti-virus application.
-
Click on Ok button when done.
