Using Resource Monitor in Windows 7
When working with Windows 7 or any other operating system it is quite obvious that as the operating system grows older its performance starts decreasing in the same proportion. In earlier days of Windows that is Microsoft Windows 2000 and Windows XP very few diagnostic tools were available and many times in production environments administrators depended on third-party diagnostic tools so that they can assess the health of the system accurately. However with the release of Windows 7 there are several built-in monitoring and diagnostic tools that work in more efficient way as compared to the tools the legacy versions of the operating systems had. Same is the case with Resource Monitor which ships along with Windows 7 and is installed by default. This small application allows administrators of the computer to view the usage of resources which they can further use to assess the problematic areas of the computer and can take appropriate actions to rectify it. As a Windows 7 administrator if you want to use this feature to monitor resource usage you are required to follow the steps given below:
-
Logon to Windows 7 computer with the account that has elevated privileges.
-
At the bottom of start menu in search box type Performance Info and press enter key.
-
On the opened page in the left bar click on Advanced Tools link.
-
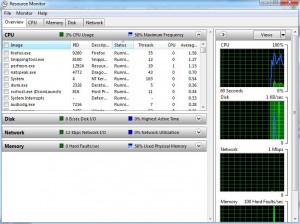
On the opened window click on Open resource monitor.
-
You can now view the usage of resources more granularly.
