How to Create a Facebook Group
As a Facebook user you can create as many Groups as you want and each Group can contain as many members as you can add in it. A Group can be considered as virtual room in which members of common interests can discuss and communicate with each other without any interference from outsiders. Creating a Group is a simple process and any user who has a valid Facebook account can create a Group and add members to it. Members can be added to any Group during its creation and if admin of the Group wants he can add members later on as well. By default when a Group is created it is configured as a Closed Group which means that it can be searched and its members can also be viewed by any other Facebook user however the contents posted by the members are still restricted for outsiders. As a Facebook user if you want to create a group you can follow the steps given below:
-
Logon to your Facebook account by providing appropriate credentials.
-
On the main page in the Search field type Groups and press enter key.
-
On the opened page click on Create Group button.
-
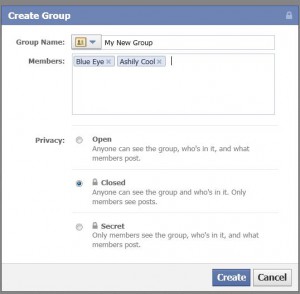
On the opened box type in the name of the Group as desired in Group Name field. Optionally you can type in the name of the members you want to add to the group in Membersfield if you want to add the members during the creation of a group.
-
Click on Create button to create the Group.
Note: You can only add members to a Group if they are added in your friend list.